The best way to repair wood holes, scratches, cracks, etc. is using wood filler. Not only wood, but some wood fillers also work on plastics as well. And some works as a glue too. So there is a bunch of use of wood fillers which is really beneficial. Having that said, if not applied properly it won’t offer many benefits, so it is extremely important that you know how to use a properly.
If you want to learn, then here is the guide for you. It is written in the simplest way, so everyone would understand very easily. Let’s begin!
Things Needed
- Suitable wood filler.
- Putty Knife.
- Sander
Pick the right filler
If this goes wrong, you won’t get the finish you expected. There are different kinds of fillers, some are filling large holes, some are for small holes. Some wood fillers are very sticky and some are less. Some fillers dry way too fast and some take hours.
You have to choose the filler according to your need. Not every filler suits every kind of crack or holes. Epoxy fillers are very sticky, they form an extremely strong bond but it cannot go deep inside the hole, so it is for repairing small holes and crack.
Related Articles
Remove paint chips and others
If the wood you will be repairing has paint chips which are falling, make sure to take all of them off. Using a scraper get rid of them as much as possible. And if you see any large splinters, remove that as well.
Sand
Smoothen the rough edges around the damaged area. It is not always possible to sand the damaged area but if you can do it. It will allow the filler to form a really strong bond that will be extremely durable. And most importantly, after sanding remove all the dust debris from the damaged area (where you will be putting filler). If there is dust, debris, the filler wouldn’t be able to form a bond and will come off very soon.
Apply the filler
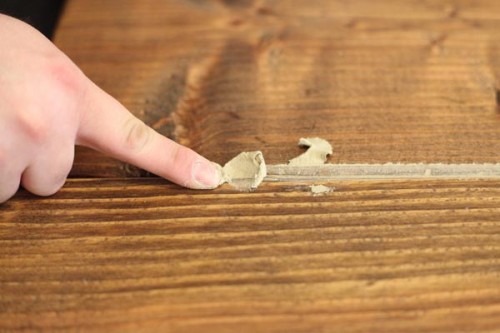
If your filler came in a tube then squeeze it on the hole or the cracked area. Ensure that the filler is going to the depth of the applied area. With something like a thin stick or pin, press the fillers down to make sure they reach inside properly. However, if your filler is fast drying you have to make sure you do everything fast. Once the filler gets harden you cannot do anything.
And if your filler doesn’t come in a tube, use a putty knife to take filler from the container, and then fill the damaged area. In both cases, you have to overfill the area a bit, and then with something moderate-heavy like small hammer keep hitting the wood piece gently. Don’t put any pressure from your side, let the weight do it.
When you will do that, the wood will vibrate and the will enable the filler to reach deep inside. And after a while with the putty knife pull off the excess filler on the damaged area.
Run the putty knife over the damaged area couple of times to make the surface level and pick off excess filler.
Wait for a while
If you have picked a fast-drying wood filler, then it would dry pretty fast. Otherwise, you might want to wait a couple of hours. Don’t hurry, let the filler dry completely and get hard like wood. Some fillers might take more than 10 hours to get dried fully.
How to Use Wood Filler Before Painting?

There are a few extra things you will need to take care of before painting or staining. Have a look!
Sand down
First, ensure the filler has dried completely. Once It is dried, now you would want to sand it down for a proper smooth finish. It is extremely important if you will be staining or painting the area. You can use an orbital sander to do the work but you can do manually with grit paper as well. But that will require good effort and is time-consuming as well. Anyways, whatever you use, make sure the surface is even and smooth.
Use primer
You can paint or stain all the fillers when they are solid. But how they would look after painting that matters a lot. So adding primer right before painting, it can help you to get the color you want. So it is extremely necessary you apply primer properly before painting and let it sit perfectly.
Apply paint
Once the sanding is done and you have used the primer appropriately, now it is time to add the paint. Make sure the surface is smooth and there isn’t any kind of dust or debris, otherwise painting wouldn’t be appropriate.
How to Use Wood Filler in Large Hole?
When you will be filling large holes with wood filler, the only thing you have to make sure is that the filler solution is going inside the hole completely, it should be able to penetrate properly, otherwise, the filler will come off very soon. So to make the sure thing, you have to pick the right filler.
If the hole is deep, do not go for epoxy wood fillers, they are super sticky. Though they make the strongest bond but they wouldn’t be able to reach deep. So there is no point in using that. Go for fillers that take little time to get dry and which are not much sticky.
And after applying the hole, vibrate the wood piece a bit by hitting with something, it will help the filler to go inside properly. Another thing is, you cannot sand inside the hole, in that case, make sure to clean that properly. Any dust debris should be there. Otherwise, there will be no benefit of picking the top-notch woo filler, the bond wouldn’t be durable.
Conclusion
This guide should be enough for learning how to use a wood filler. Tried our best t keep this guide as simple as possible so that you can understand better. Hope you find this useful.


